/
E210 - How to use serial port RS-232
E210 - How to use serial port RS-232
E210 - How to use serial port RS-232
Configuration
To start, you need to enter the IP of your device and enter on Services>Serial Once you are on this page, you have to configure the Serial Configuration- Baud Rate: 115200 (Depending on the Comm Port)
- Data Bit: 8 (Default)
- Parity: None (Default)
- Stop Bit: 1 (Default)
- Mode: Transparent (Default)
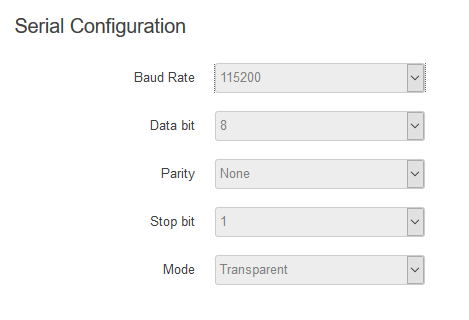
Client Mode
You have to configurate the Data Send Configuration:- Protocol: TCP
- Mode: Client
- IP: The IP your PC is providing you
- Port: 5555 (Default)
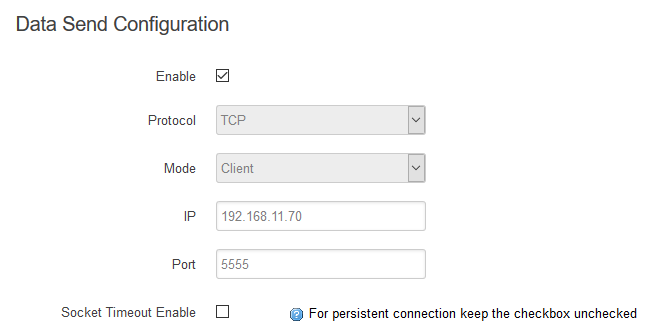
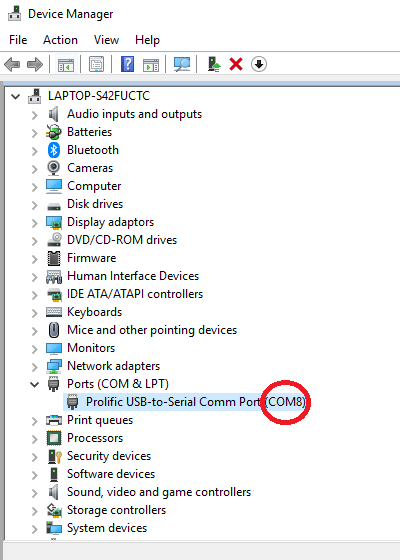
Then click on Save & Apply To know on which COM is your device connected, go to Device Manager and you will be able to watch it.
Then you need to open 2 setups one in Serial and the other one in TCP Server On the Serial one you just have to put the same Serial Configuration data and click on Open.
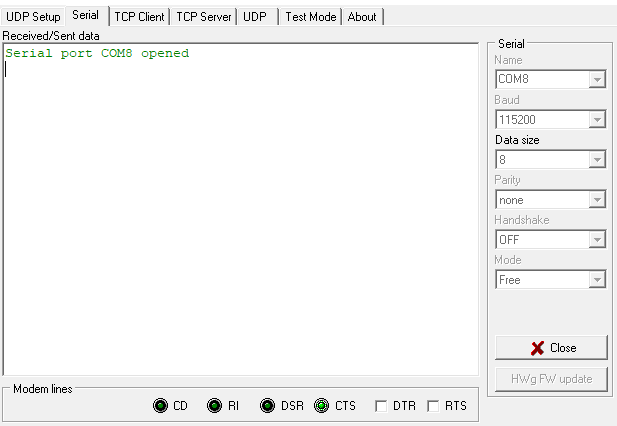
On the TCP Server one use the same port and click on Listen and both will be connected.
Now you can send information from Serial to TCP Server and vice versa.
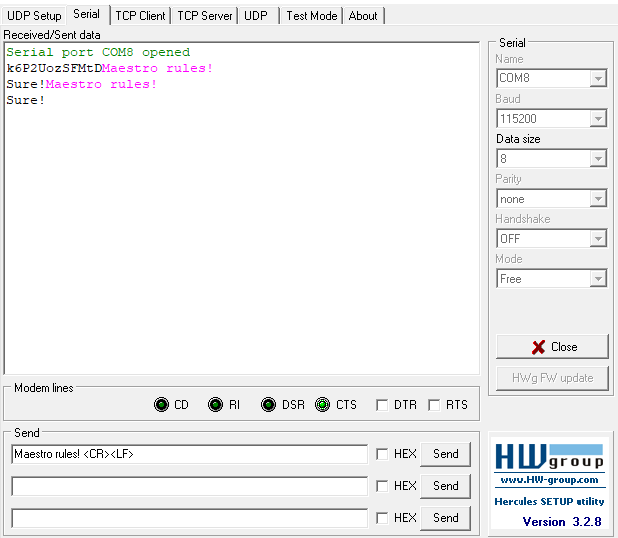
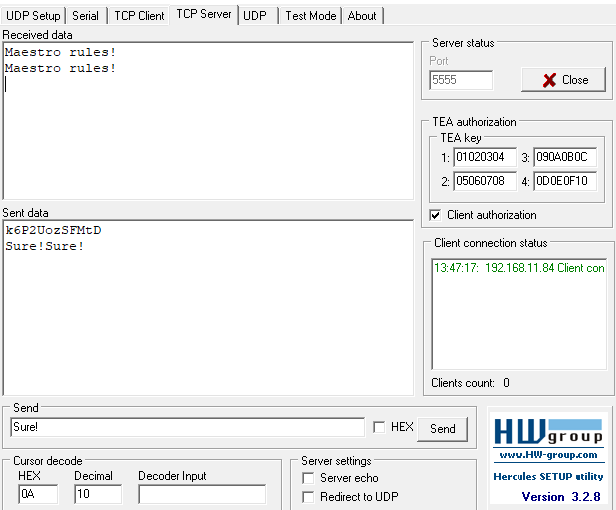
Server Mode
You have to configurate the Data Send Configuration:- Protocol: TCP
- Mode: Server
- Type: Internal
- IP: 192.168.1.1 (Default)
- Port: 5555 (Default)
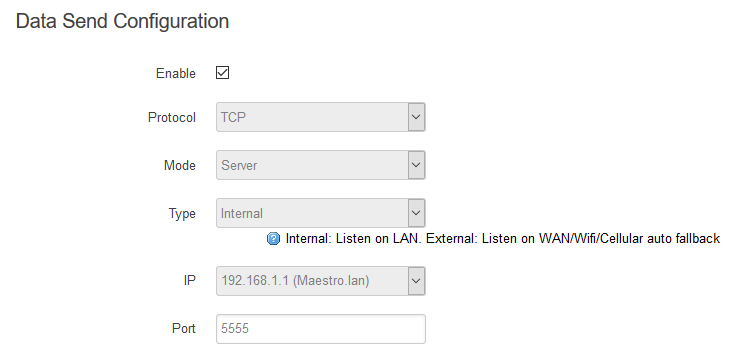
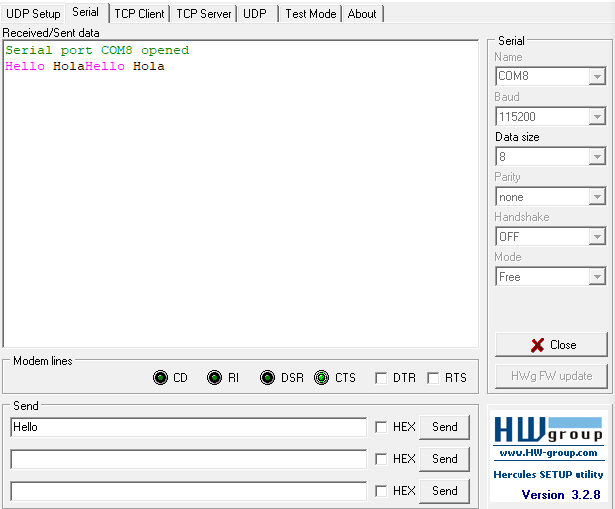
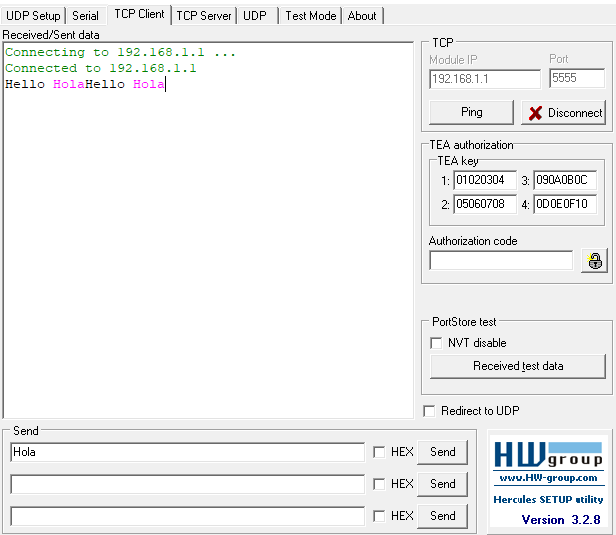
Then click on Save & Apply The Serial configuration is going to be the same as in Client Mode On the TCP Client use the same Module IP and Port and click on Connect Once both are connected you can send information from Serial to TCP Client and vice versa
[Originally Published On: 09/23/2019 06:00 AM]
, multiple selections available,
Related content
AutoTCP setup for M110
AutoTCP setup for M110
Read with this
SnapCap guide for M110 and E210 series
SnapCap guide for M110 and E210 series
More like this
CoBox & UDS - What TCP port #s should I use to connect to a serial port?
CoBox & UDS - What TCP port #s should I use to connect to a serial port?
More like this
Basic troubleshooting of RS232 serial connections
Basic troubleshooting of RS232 serial connections
More like this
Using RFC2217 for remote control of most CoBos and Evolution device server serial ports
Using RFC2217 for remote control of most CoBos and Evolution device server serial ports
More like this
Emulate a direct serial connection over the LAN (Serial Tunnel) - UDS, xDirect, SDS, WiBox, XPort, WiPort, XPress-DR & CoBox
Emulate a direct serial connection over the LAN (Serial Tunnel) - UDS, xDirect, SDS, WiBox, XPort, WiPort, XPress-DR & CoBox
More like this