xPrintServer-Home Edition - Printing from a Windows PC to a USB printer
How do I print from my Windows PC to my USB printer that I have connected to my xPrintServer?
The xPrintServer-Home Edition is able to handle print jobs from Windows PCs and Apple Mac machines besides printing from iOS devices.
Printing from a Windows PC to an xPrintServer-hosted printer is easy with the Bonjour Print Client installed on the PC. The Bonjour Print Client can be downloaded from Apple's website site at the following link:
http://support.apple.com/kb/dl999.
Bonjour Print Client allows your PC to search for available AirPrint printers, using the same AirPrint discovery mechanism as an iOS device when searching for available printers. When you run the Bonjour Print Client wizard, it searches for available AirPrint printers on the network.
From the search results, you can add specific discovered AirPrint printers to your Printers and Faxes folder in Windows. The xPrintServer responds to AirPrint printer requests with its list of available printers, so this list of printers will also appear in a Bonjour Print Client search. Once you find your USB printer in the list, adding it to your Windows Printers and Faxes folder is easy.
Things are a little different for Windows PCs that don't have the Bonjour Print Client installed. With a few steps, you will still be able to map and print to a xPrintServer-hosted USB printer from your Windows PC.
Part (A) below discusses Printing from a Windows PC with Bonjour Print Client Installed. Proceed to part (B) for instructions for Windows PCs that do not have Bonjour Print Client installed.
Note: At the time of this writing, this article applies to the xPrintServer-Home and Office Editions. This will also apply to the Network Edition when firmware version 3.x is released for it.
A. Printing From a Windows PC with Bonjour Print Client Installed
Assuming that the Windows PC and xPrintServer are online on the network, download the Bonjour Print Client from the link above and install it on your Windows PC.
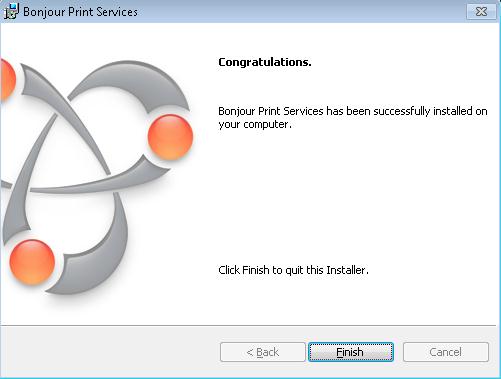
Fig 1. Bonjour Print Client successfully installed
Locate the Bonjour Print Client Wizard on the Windows Start Menu. Launch it.
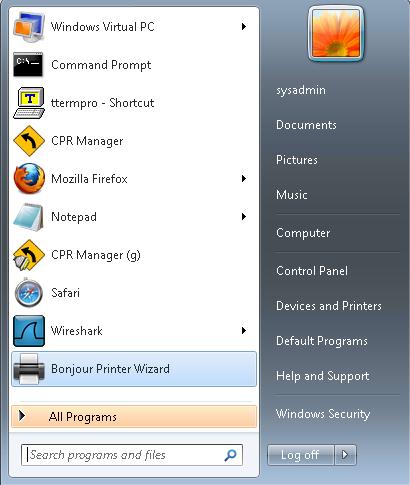
Fig 2. Bonjour Print Client Wizard on the Windows Start Menu
The Bonjour Print Client will generate a printer search broadcast for any available AirPrint printers on the network, using the same printer request message that an iOS device makes when looking for printers. AirPrint printers communicate over Bonjour and will reply to the request, generating a list of available printers. Find the xPrintServer's printers in the list. They will appear as <Printer Make and Model - xPrintServer [xPrintServer:MAC:Address]> or some variation thereof, similar to how it appears below.
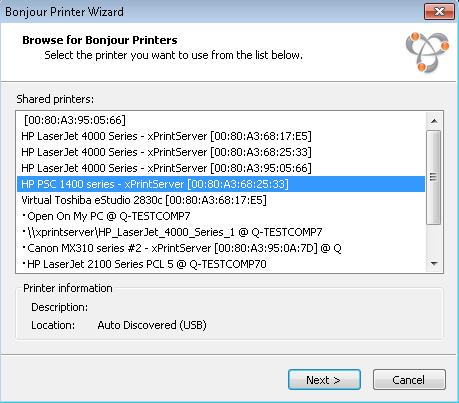
Fig 3. Bonjour Printer Wizard Printer Request Results
Click Next.
Install a driver for the printer by selecting from the preinstalled drivers in the Windows OS, or by providing your own drivers. Select the Manufacturer and Model, or click 'Have Disk…' if you are providing your own printer driver. For the sake of illustration, we selected the 'HP PSC 1500 series' driver for the HP PSC 1400 printer. Selecting an exact printer model match is the correct way to do this.
Fig 4. Install Bonjour Printer. Select which printer driver to use.
Click 'Finish' at the end of the Wizard. Bonjour Printer Wizard will add the printer to Windows Printers and Faxes folder.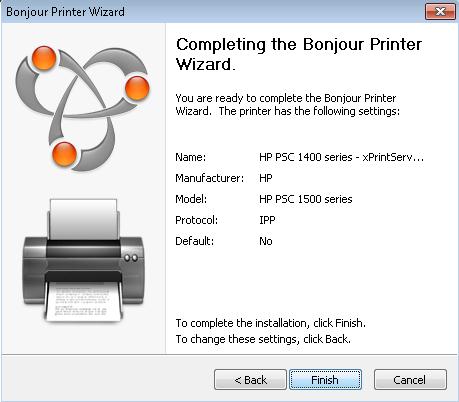
Fig 5. Last step of the Bonjour Print Client Wizard.
Verify that the printer is added in the Windows Printers and Faxes folder.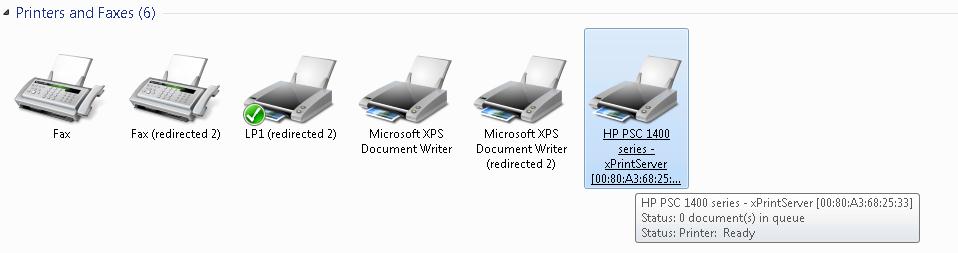
Fig 6. xPrintServer USB Printer added in Windows Printers and Faxes list
At this point, you can start using the new printer as you would any other printer connected to your PC.
B. From a Windows PC without Bonjour Print Client Installed
For this method, you will need the Printer Share Information of the USB printer that is connected to the USB port of the xPrintServer-Home Edition. You will use this share information to manually map a network printer to the xPrintServer using Windows' Add Printer Wizard.
Launch a web browser and log into the xPrintServer.
Browse to the Printers > List page.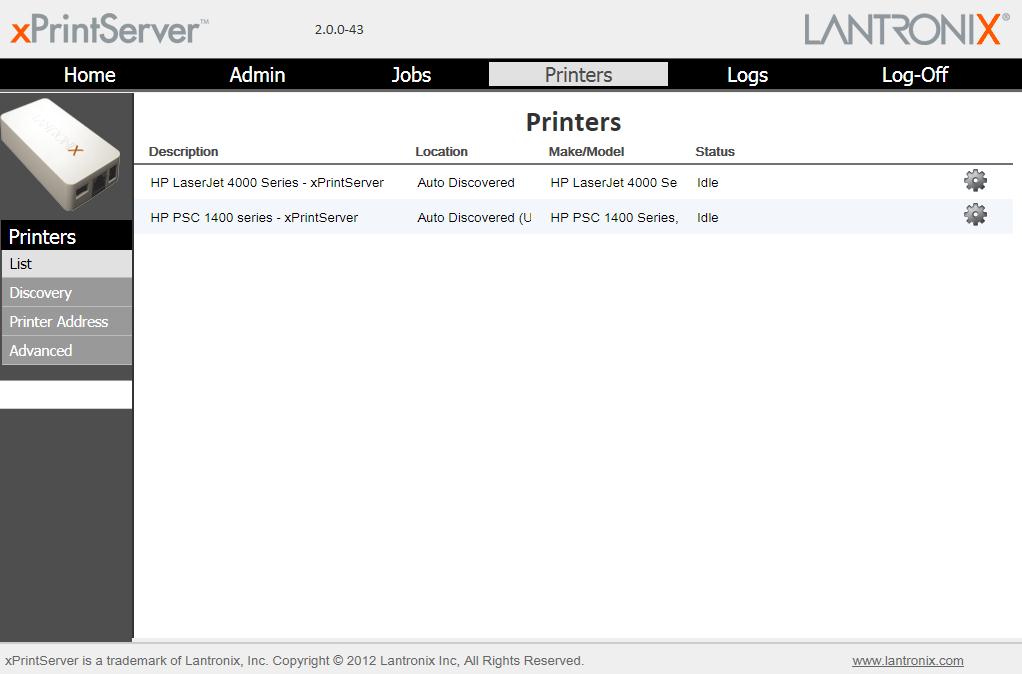
Fig 7. xPrintServer's Printers > List page.
Click on the sprocket icon to the right of the printer entry.
Click on 'Show Share Information'.
Fig 8. Items in Printer Properties (sprocket icon).
Write down the share information of the printer, or save to text file. This is how the xPrintServer shares the USB printer on the network. You will need this later to map a network printer in the Windows Add Printer Wizard.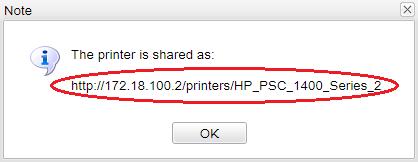
Fig 9. Printer Share information
Launch the 'Add a Printer' wizard in Windows.
In Windows XP, the wizard sequence is similar to below: (for Windows 7, proceed further to next sequence)
Click Start > Printers and Faxes.
Click 'Add a printer' to launch the wizard.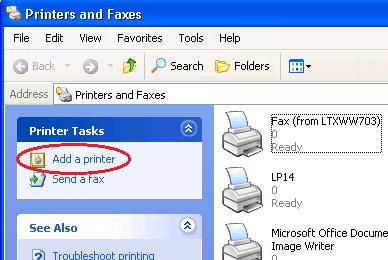
Fig 10. Add a Printer wizard link in Windows XP
Click Next.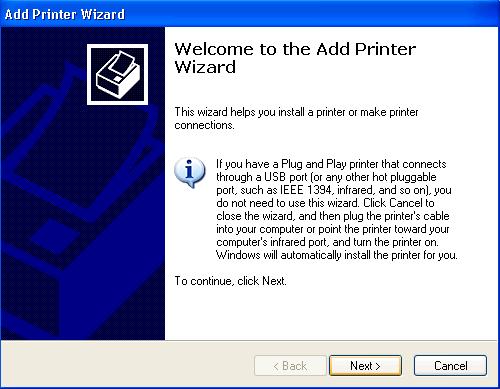
Fig 11. Step 1 of Add Printer Wizard in Windows 7.
Choose 'A network printer, or a printer attached to another computer'. Click Next.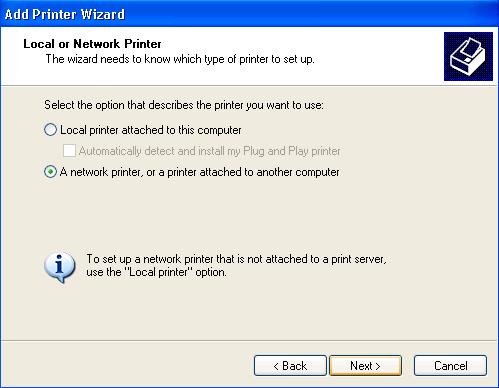
Fig 12. Choose between Local or Network printer. Select 'Network Printer'.
Select 'Connect to a printer on the Internet or on a home or office network:'.
In the URL field, enter the share information of the USB printer taken earlier from the xPrintServer.
Click Next.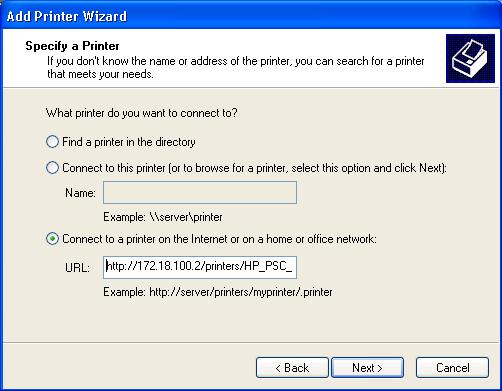
Fig 13. URL field where you enter the USB printer's Share Information
Choose the Make and Model of the printer. Provide a the driver disk if the printer model is not found in the list of Windows drivers. For the sake of illustrating the example, we selected the HP PSC 950 driver to complete the wizard. Click OK.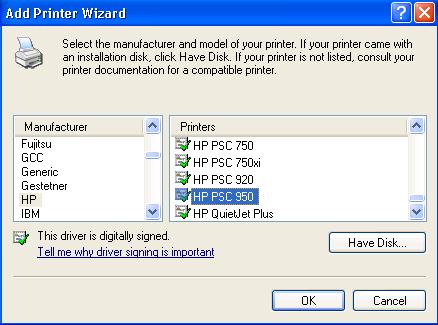
Fig 14. Choose Printer Manufacturer and Model or provide driver disk
Choose whether or not you want to designate this printer as the Windows default printer.
Click Next.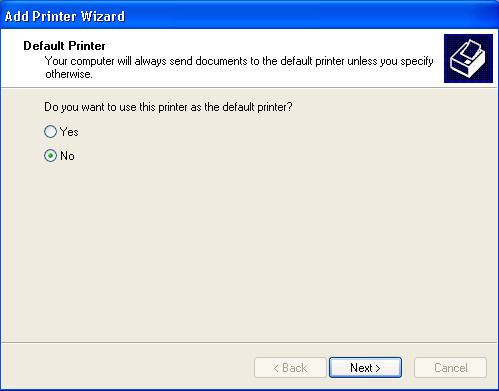
Fig 15. Make default printer - Yes/No?
You have completed the Add Printer Wizard.
Click finish.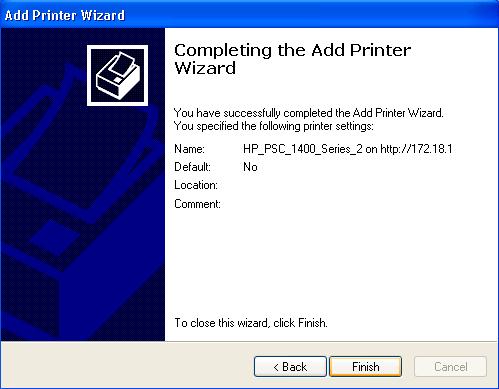
Fig 16. End of Windows XP Add Printer Wizard.
Verify in the Printers and Faxes folder that your new printer has been added.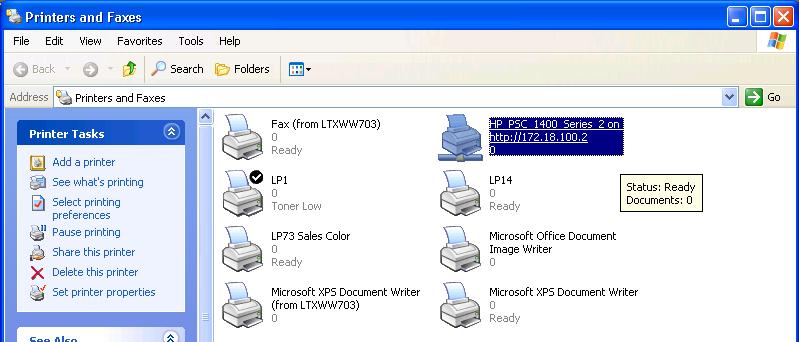
Fig 17. xPrintServer-hosted USB printer added to Printers and Faxes folder.
---
In Windows7, it looks like this:
Click the Windows Start button > Devices and Printers.
Click 'Add a printer'.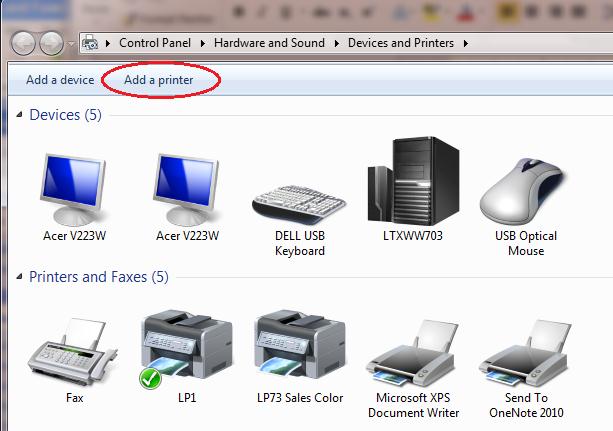
Fig 18. Windows 7 Printers and Faxes list in Devices and Printers folder
Select 'Add a network, wireless or Bluetooth printer'.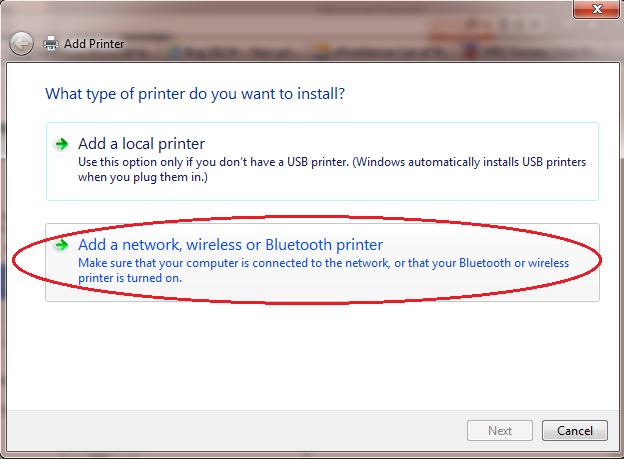
Fig 19. What type of printer to install?
The Add Printer Wizard will scan the network for available printers. The printer shares from the xPrintServer will not show up.
Select 'The printer that I want isn't listed'.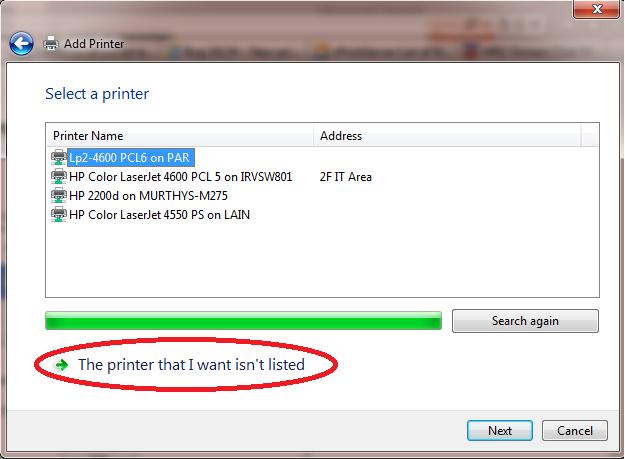
Fig 20. Select a printer
Choose 'Select a shared printer by name'.
In the field below it, enter the share information of the USB printer taken earlier from the xPrintServer.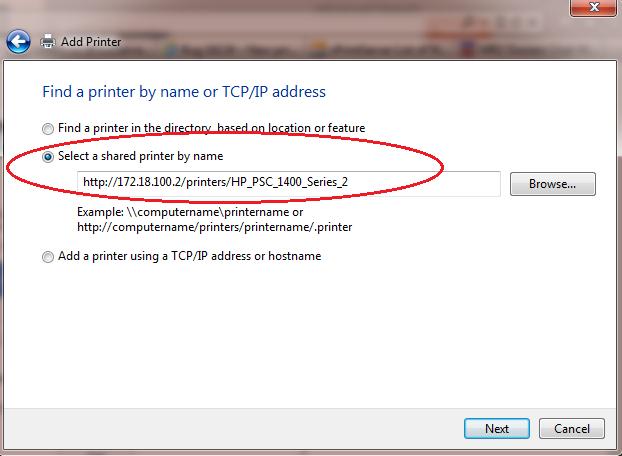
Fig 21. Field for xPrintServer-hosted USB printer's share information
Choose the Make and Model of the printer. Provide a the driver disk if the printer model is not found in the list of Windows drivers. In this example, Windows 7 has the driver for a HP PSC 1400 series. Click OK.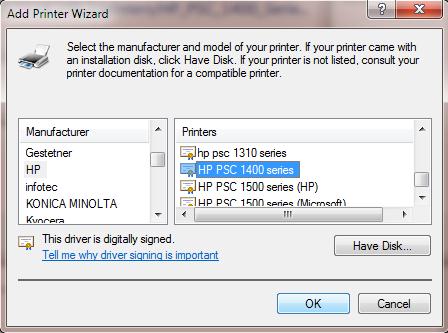
Fig 22. Choose Printer Manufacturer and Model or provide driver disk
Shared printer successfully added and showing the printer name.
Click Next.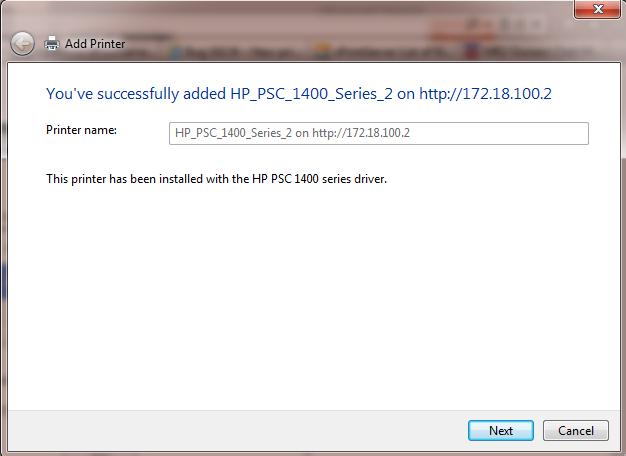
Fig 23. Windows printer name
Choose whether or not you want this printer to be the default printer. Click 'Print a test page' to send a Windows test page to the shared printer. You have finished the Add Printer Wizard. Click Finish.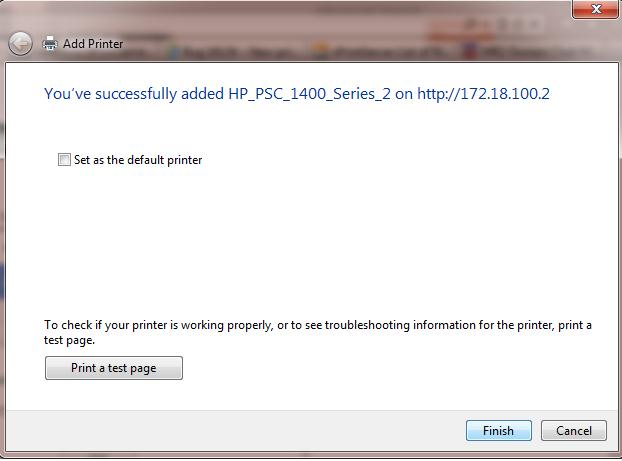
Fig 24. Set default printer and Print Test Page at end of Windows7 Add a Printer Wizard
Verify that the new xPrintServer-hosted USB printer has been added to the Windows Printers and Faxes list.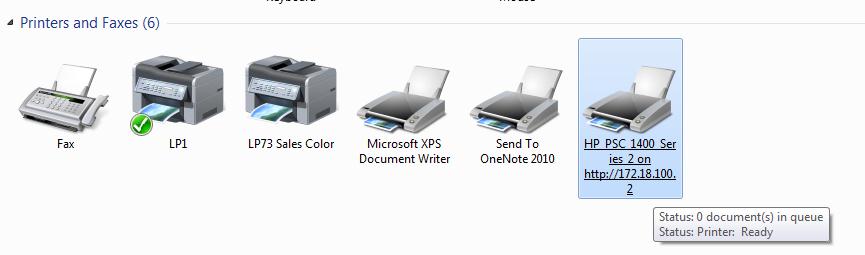
Fig 25. xPrintServer-hosted USB printer now added to the Windows 7 Printers and Faxes list
Note: At the time of this writing, firmware that will allow this type of printing to the xPrintServer Network Edition is under development.
Latest Firmware for the Apple Certified xPrintServer Office Edition
[Originally Published On: 09/14/2012 02:33 PM]