Using the second serial port of the xPicoWiFi
- Jane
How can I use the second serial port xPico-WiFi on the Evaluation board?
The second serial port is available on the evaluation board (XPW100100K-01) as a USB-interface (J5) or a 3-pin header (JP18). The latter is a 3,3V TTL-interface which can be used to connect directly to a microcontroller.
For this FAQ we will use the USB-interface J5 and assume the xPico-WiFi is running factory default settings.
To be able to login to the web manager of the xPico-WiFi you need the following information:
SoftAP IP-address: 192.168.0.1
The xPico-WiFi will show its SSID when doing a network search as XPICO_xxxxxx
(xxxxxx indicates the last 3 bytes of the MAC address)
WPA2 security passphrase: XPICOWIFI (all caps)
To login into the web manager type in the IP-address 192.168.0.1 in your browser URL field and use the following credentials:
User name: admin
Password: PASSWORD.
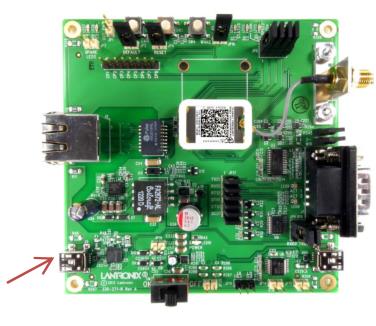 To set up a serial tunnel connection using USB, you need to use port 10002 and the mini USB-connector located on the same side as the Ethernet connector.
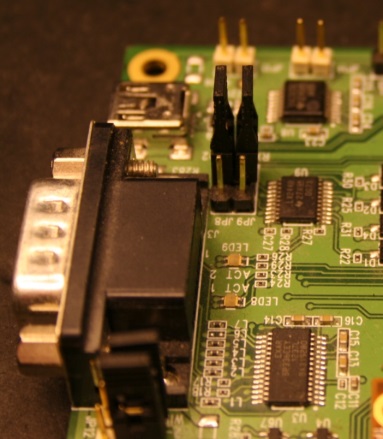 Next to that please place jumpers JP8 and JP9 to connect pin 2 and 3. (Illustrated in the photograph on the left.)
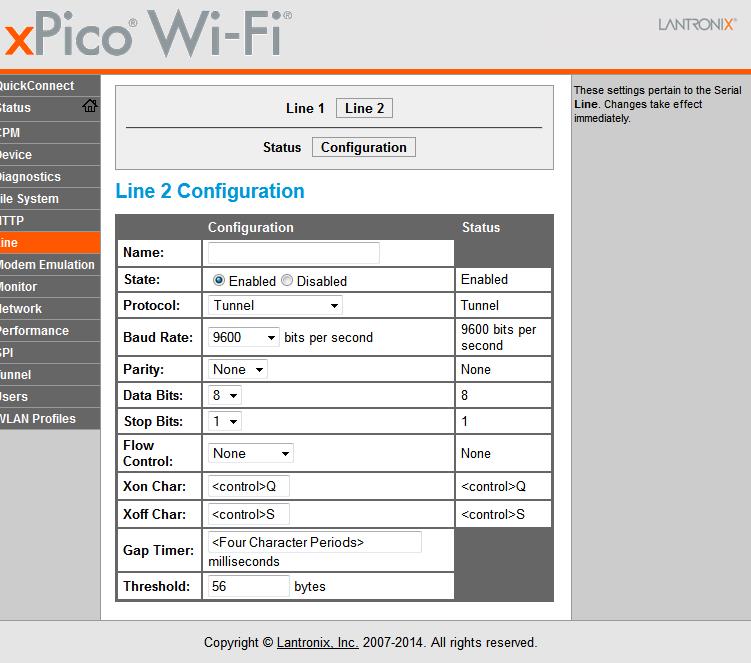
In this example we use line 2 the USB-interface on your evaluation kit (XPW100100K-01) USB-interface connected to line 2. Line 2 is set up as tunnel mode.
Please see the screenshot below:
Please see the configuration of Realterm below:
Note: You can download Realterm at: http://realterm.sourceforge.net/
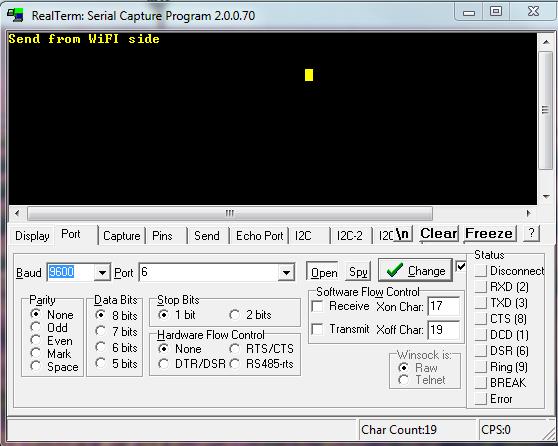
In the example above virtual port 6 is created for the USB-connection. This can be a different port in your computer! You need to set the baud rate in Realterm to 9600. Select "Open" to activate the connection.
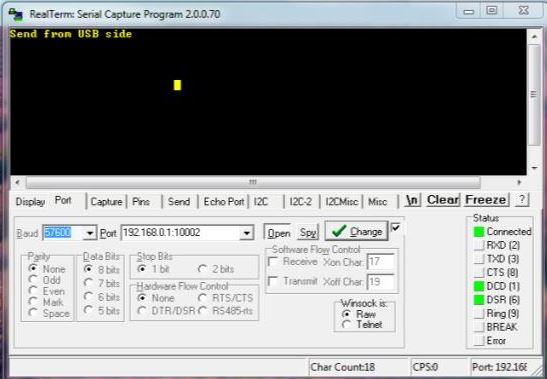
In the example above the PC has been assigned IP-address 192.168.0.2 by the xPico-WiFi SoftAP. This can be a different port in your computer!
Please enter the string 192.168.0.2:10002 in the Port field of Realtime and clock on "Open".
[Originally Published On: 01/07/2016 04:39 PM]