xPico - Resetting to factory defaults
- Jane
How do I set the xPico to its factory defaults using the Default switch when using the evaluation board?
There are several ways to reset the xPico to its factory defaults:
1. Webmanager using a Java-enabled web browser
2. Telnet
3. Serial Interface 1.
4. Uploading setup records with the factory settings using Device Installer
5. Using the default switch on the evaluation board (read IO-pin).
The first 3 options are explained in great detail in the user guide: http://www.lantronix.com/pdf/xPico_UG.pdf, and option 4 is explained in the Device Installer user guide: http://www.lantronix.com/pdf/DeviceInstaller_UG.pdf.
While the first 4 options require a 2 step approach (setting the unit to its default settings, reboot and then clear the network settings), option 5 will set both to their factory default settings.
There is also an alternative way to reset the network and the other settings to their default settings with one method as described in Knowledge Base Article 1523: How to Save and Transfer a Setup Record on a CoBos Device Server
This articles explains how to use the "Default" switch of the evaluation board to reset the xPico to factory settings.
Using the "Default" switch on the evaluation board
The xPico has a dedicated "Set-To-Default" pin (pin36), which allows you to reset the xPico to its factory defaults when using the "Set-To-Default" pin (pin36) in combination with the external reset pin (pin 38).
For this option to work with the evaluation board, Jumper JP3 and JP4. See the picture below: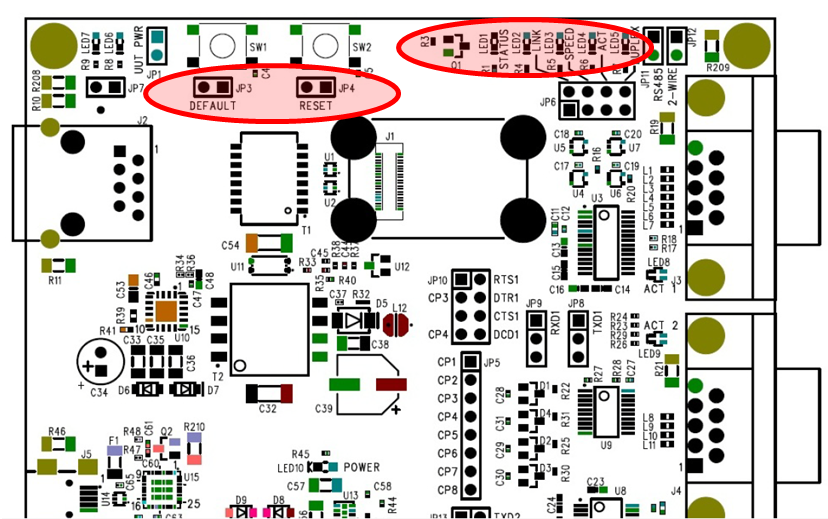
To set the xPico to its factory defaults, reboot the unit while holding down the Default switch for 6 seconds. The Status LED starts blinking every second to indicate when to release the default button, completing the function to reset the xPico to factory defaults. The xPico will reboot after releasing the Default button.
[Originally Published On: 01/16/2015 08:47 AM]