SnapCap guide for M110 and E210 series
Introduction
 SnapCap is an accessory which converts RS-232 port on a 9-pin sub-D connector into an isolated half or full duplex (user-selectable via switch) RS-485 port on a 5-pin, 3,5mm pich, COMBICON connector.
General setup
You can follow this diagram to connect the RS-485 cable to the SnapCap: Where:
- B = Data-
- A = Data+
- G = GND
Setup for M110
Firstly, connect the RS-485 in the SnapCap as shown in General Setup and connect the SnapCap to the RS-232 input in the M110 device. Finally, you are able to communicate via RS-485 with the device.
Setup for E210
Firstly, download the file snapcap.sh and copy it in /etc/init.d/ (view Copy files with SCP)
snapcap.sh
Then, enter via SSH to the router (view SSH access) and execute the following code:
snapcap.sh
Version: 1 – File size: 1 KB
Version: 1 – File size: 1 KB
chmod u+x /etc/init.d/snapcap.sh
/etc/init.d/snapcap.sh enable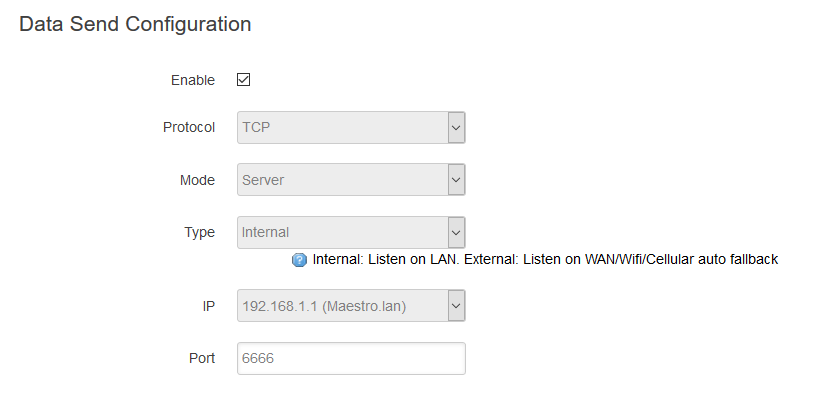 Finally, setup the Serial and TCP Client as shown in the pictures bellow and you will be able to communicate from one channel to the other with the SnapCap working on the device.

[Originally Published On: 09/23/2019 11:22 AM]