Windows 2000 and higher, TCP-IP socket printing
What is the procedure for installing a Windows 2000 or higher print queue, using TCP socket printing to a Lantronix print server?
TCP/IP Socket printing Configuration:
-------------------------
To install a TCP Socket print queue:
1. From the Windows Control Panel, double click on "Printers"
2. Double click on the "Add Printer" icon (Win2K) or single click "Add a printer:" in Printer Tasks (XP).
3. Click "Next" in the first window.
4. Select "Local Printer" (De-select "Automatically detect and Install my Plug and Play printer")

5. Click "Next"
6. Select "Create a new port"
7. Change the "Type" to "Standard TCP/IP port"

8. Click "Next".
9. Click "Next" in the Window that asks you to make sure the device is turned on and connected to the network.
10. Enter the Lantronix device's IP address for the "printer name or IP address".
11. Enter the "Name" that you want the port to be called in Windows.
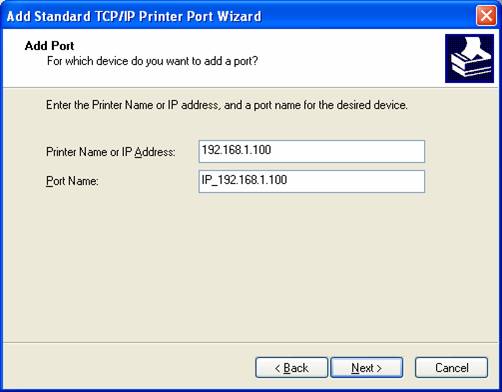
12. Click "Next"
13. Under Device type, select "Custom", then click on "Settings".
14. Under "Protocol" select "Raw".
15. Under "Port Number" enter the TCPPort of the Lantronix Device and port that you want to print to. See below for information on what port number to use.
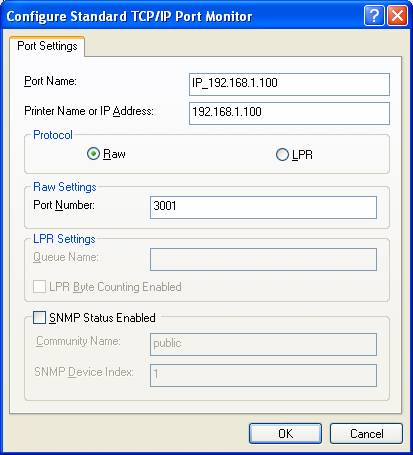
16. Click "Ok"
17. Click "Next"
18. Click "Finish"
19. Finish the setup by selecting the Printer as you would for a standard Local printer.
To determine the correct TCP Port to use to communicate with a Lantronix print server or terminal server (e.g. EPS, MPS, LPS or ETS), add the number of the port with a connected printer to 3000.
For example:
Port 1 = 3001
Port 2 = 3002
port 3 = 3003
etc.
To determine the correct TCP Port to use to communicate with a Lantronix device server (e.g. a UDS, WiBox or EDS), add the number of the port with a connected printer to 10000.
For example:
Port 1 = 10001
Port 2 = 10002
port 3 = 10003
etc.
[Originally Published On: 07/12/2000 03:31 PM]